Some tips for traveling with photography gear


Venezuelan Troupial, Curacao ~ September 2019
I love to travel to places where I can look for and photograph "new" birds and other wildlife. Many times, air travel is involved, so this post will mainly address that, although the thoughts discussed here can be applied to any time you need to pack a suitcase and/or haul gear around.
Travel can make taking along photography gear a challenge. I like to take along equipment that allows me to photograph birds (=big telephoto lens) as well as landscapes (=heavy wide-angle lens), in addition to other types of photos that I might take, such as macros. So not only do I pack lenses, I need to bring a camera body, batteries, a battery charger, and SD cards too. That's what I would consider the bare minimum. But it is that essential gear that I DO NOT UNDER ANY CIRCUMSTANCES check-in to go in the aircraft's cargo hold. I've seen how the baggage handlers toss around suitcases while loading and unloading the plane, and that's all I need to know to convince me to always take my essential gear in a carry-on camera backpack, so I am in control of where it is at all times. If the airlines loses my checked-in bag, at least my trip won't be ruined by my not having my most-essential gear. Also, in case you are not aware, airlines do NOT cover damage or theft to electronic or photographic equipment. Since I'm not a pro, I do not insure my equipment as it is not cost-effective (any quote I've gotten has been in the neighborhood of $500/yr.!). You can bet that, if I'm ever asked to check my carry-on camera backpack, I'll be very emphatically resistant to doing so!
To keep my camera backpack from becoming too uncomfortable to carry for long periods of time, such as walking around an airport, I do carefully pack additional items that I feel will be either well-protected in my checked bag, or that I could live without if they got damaged. In trying to protect some of my gear, I've found it to be a challenge to be able to pack all the other items, such as clothing, that I may need on my trip! When I've flown Southwest, which has a generous baggage policy, I was previously not that concerned with how I packed. But lugging around too much luggage can also be very tiring. On one recent birding trip, I tried the "rolling" method of clothes packing, as it helps to maximize suitcase space by reducing gaps that are created by folding clothes. I also tried to utilize every bit of spare space with small items, such as stuffing socks in shoes, a hair brush in a water bottle, etc. However, I found this method a bit stressful, as each time I unpacked and then packed again, I had to "rebuild the puzzle" if I could even remember how I packed each item originally -- it was time-consuming. So I did a little googling to see if others had other packing methods that might work better.
Here's what I found that has become my new "go-to" packing method: Vacuum storage bags. You place a stack or two of clothes in a bag, seal it, and using a vacuum hose or hand pump, remove all the air from the bag. When done, you will have GREATLY reduced the volume of the bag contents! I bought a set of bags, that included a small hand pump, from Amazon and tried them out. WOW. I'm a believer. You can check out the actual bags that I bought for more information, but there are many different ones available. I highly recommend getting a set with the small pump, because you'll need to use it again when you pack to come home from your trip. It only takes a couple of minutes to use the air pump, but it's more fun to use a vacuum because it works so fast. BONUS: You can use the extra bags to store things like winter blankets, comforters, clothes, etc., to free up closet space. Anyway, here's the link, to be followed by some before/after pics: Vacuum Bags w/pump.
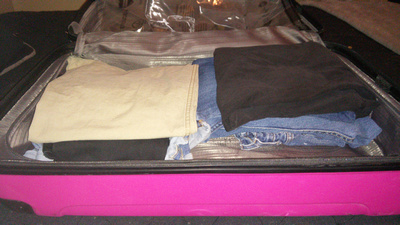
A couple of stacks of clothes to be packed:
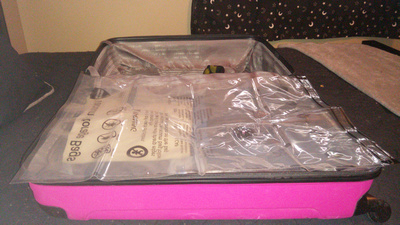
The size of the bag to be used:
After the bag has had the air removed:
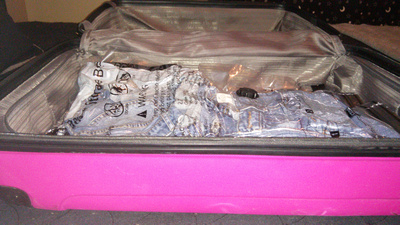
As you can see, the volume of the bag's contents have been shrunk down considerably!
The caveat to this method is, since you will be freeing up space in your suitcase, you will be able to add even more "stuff". So you will have to make sure that your suitcase isn't too heavy once done! If you don't have one already, a small hand-held luggage scale is very handy to make sure you don't have an unpleasant (and expensive) "over-sized bag" surprise when you check your bag at the airport.
On the way home from my last trip, I had a connecting flight at Chicago's O'Hare airport. I've never had to walk so far in an airport as I did there. To make matters worse, my gate changed 3 times before my flight, so I had to walk even more. In addition to my camera backpack, I also bring a laptop bag with me so I can download my photos at the end of the day, and my laptop is another item that I never check-in! My camera back-pack will actually hold my laptop, but not only does that make it heavy but I feel my laptop is more secure in its own padded bag. Well, with all that walking after a 4+ hour flight, I was pretty exhausted. With that in mind, after I got home I set out to figure out what other thing I could do to make hauling around my non-checked in items a bit easier for future trips!
Here's what I found as a solution: A very compact folding luggage cart! The item dimensions and other features (the one I ultimately bought has a 70 lb. capacity) would work out very well, from what I'd read in the item description. As soon as it was delivered, I tried it out with my camera backpack and laptop bag. YAY! This will work. As soon as I check my suitcase in, I'll whip this baby out and put my camera backpack and laptop on it and can either push or pull it - life will be so much easier! And when folded up right before I board the plane, the cart would even fit in the laptop compartment in my camera bag, OR I could strap it to my laptop bag prior to stowing it in by my feet in the aircraft. Here is the link to the cart that I found, followed by a couple of photos demonstrating it in action: Compact Folding Luggage Cart.
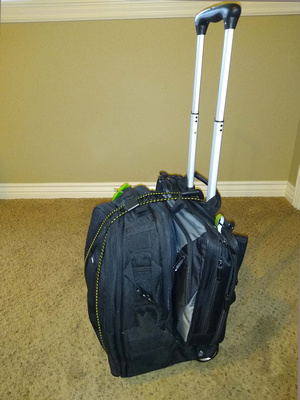
Handle fully extended, camera backpack and laptop bag bungee'd onto cart:
When folded up, cart is small enough to fit with another carry-on item, shown here with my camera backpack:
In summary, I hope the above gives you some ideas towards making traveling with photography -- or any other -- gear more comfortable, economical, and practical! If you have any of your own tips to share, please comment on this post!
